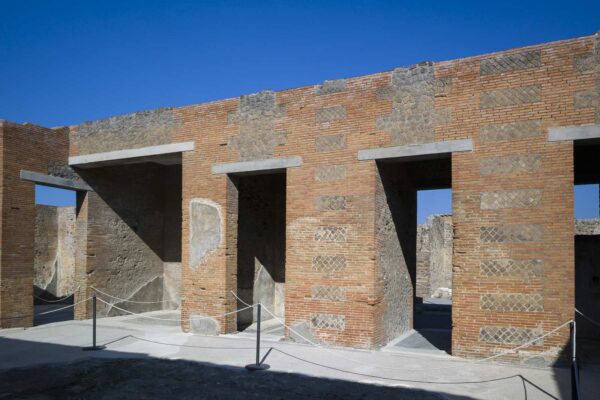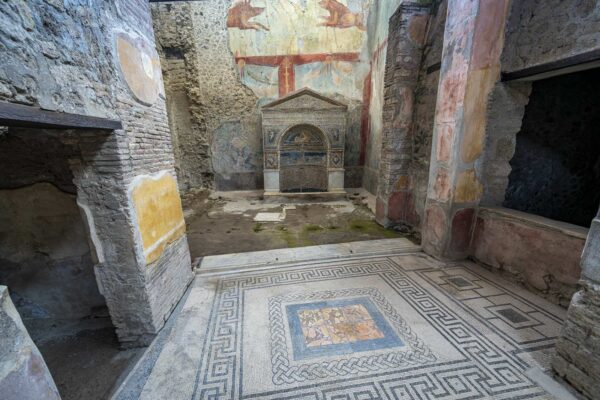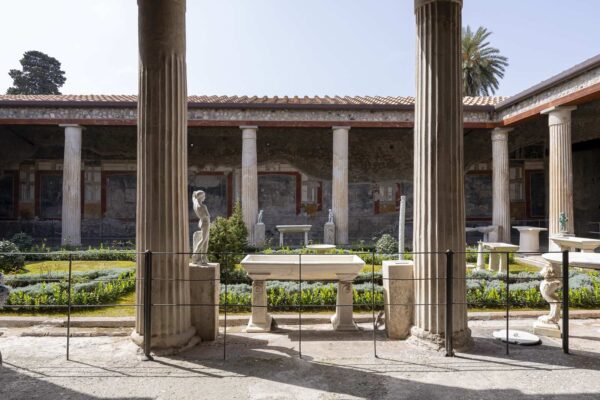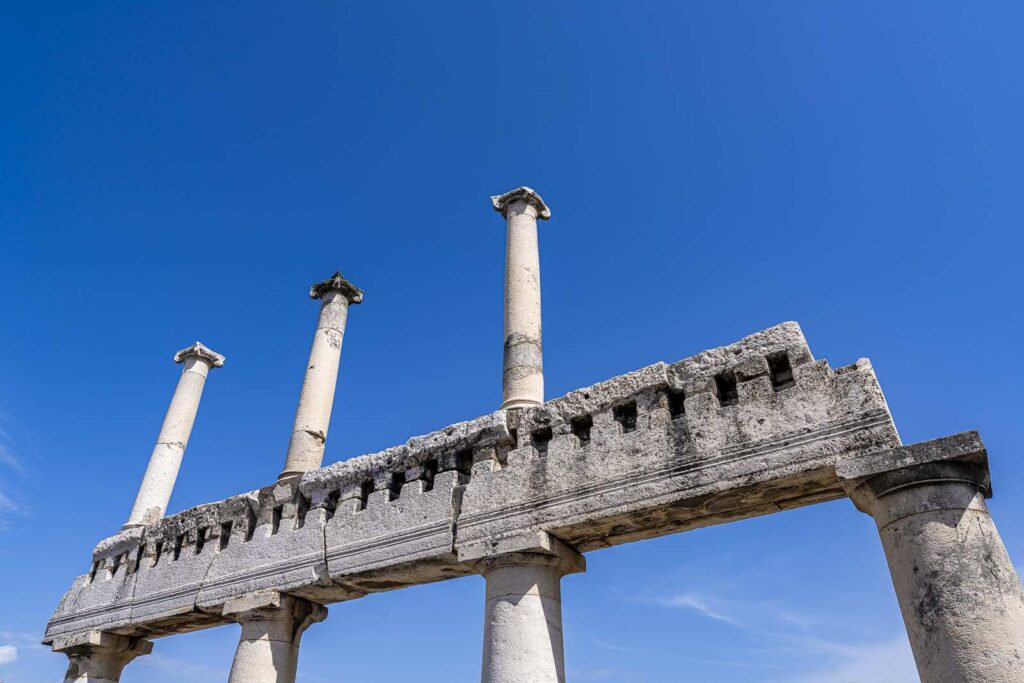
Introduction
Pompeii is one of the most famous archaeological sites in the world. It is a Roman city frozen in time since the eruption of Mount Vesuvius in 79 AD. For many photographers, visiting these ruins is a unique experience: an unparalleled encounter with art, history, and wonder.
The remains of domus, streets, and frescoes offer glimpses into everyday life from two thousand years ago, while Vesuvius looms in the background as a silent witness.
Photographing Pompeii, however, requires some preparation. Familiarity with the park’s regulations, such as restrictions on tripods and flash, and an understanding of how to manage changing light conditions can make a significant difference.
The sheer scale of the site also calls for thoughtful itinerary planning. In this guide, you’ll find practical tips to help you capture unforgettable shots, regardless of your photographic experience or the equipment you use.
Goal of the Guide
This guide provides a comprehensive overview of how to photograph Pompeii with intention and success. It covers key topics such as choosing the right equipment—from smartphones to DSLRs—understanding conservation regulations, and identifying the most photogenic locations.
Whether you’re a casual visitor hoping to take home high-quality memories or an experienced photographer planning a personal project, you’ll find everything you need to plan your visit, manage light and crowds, and capture images that truly convey the spirit of Pompeii.
The Importance of Photographing Pompeii
Pompeii was a thriving commercial and cultural centre in ancient Rome, located at the foot of Mount Vesuvius.
Its economic growth was fueled by its strategic position along major trade routes and a port that enabled intense exchanges across the Mediterranean. In 79 AD, a sudden and devastating eruption of the volcano buried the city under a thick layer of ash and pumice, killing thousands of inhabitants.
The catastrophe happened so quickly that many buildings—and the daily life within them—remained remarkably intact, frozen in time.
Pompeii was forgotten beneath volcanic deposits for centuries until excavations began in the 18th century under the Bourbon rulers. Its streets, shops, baths, aristocratic houses, and public spaces were gradually brought to light. This rediscovery offered an extraordinary window into Roman society—its customs, habits, and even the private lives of its citizens.
Today, Pompeii is considered a remarkable open-air historical document, vividly conveying the everyday life of a lost world. The significance of its discoveries, from mosaics and frescoes to sculptures, has made it one of the world’s most important and visited archaeological sites, recognised and protected as a UNESCO World Heritage Site.
Photo Souvenir or Photographic Research?
For many visitors, photographing Pompeii means taking home a few souvenir shots to share with friends and family—spontaneous images that capture the trip’s highlights.
This approach, known as “souvenir photography,” doesn’t require advanced technical skills or professional equipment. The main goal is to preserve a fragment of personal experience, something to reflect on and relive later.
By contrast, “photographic research” is a more intentional and thoughtful practice beyond mere documentation. In this case, even an amateur with a genuine passion may try to tell a story, express an emotion, or explore deeper meaning through images.
It’s not just about capturing a famous monument, but about conveying its atmosphere, relationship with the surrounding space, or even the human presence that animates it.
This type of photography seeks original perspectives, plays with light and shadow, and experiments with composition.
These two approaches are not mutually exclusive—they can easily coexist during the same visit. The souvenir photo anchors the image in personal memory, while photographic research expands the creative scope, revealing the many layers of a site as rich and complex as Pompeii.
The Value of Personal Vision in Photography
When approaching a place like Pompeii, it’s not enough to take pictures because it’s famous. Your vision truly matters—the impulse to begin and pursue a photographic project. As renowned British photographer Mark Power notes, it’s often impossible to know whether an idea will work in advance.
There’s no magic formula to determine which subjects or themes will hold our attention or lead to meaningful results. The process is experimentation: prioritising, pausing, and returning to a project with fresh eyes.
While this approach may seem unpredictable, it’s the driving force behind creativity. Even in a place as photographed as Pompeii, Power reminds us that not everything has been captured yet. The world keeps changing—and so does Pompeii, through discoveries or shifts in how visitors experience the site. Revisiting a subject explored by others is not a flaw, as long as you bring your perspective to it.
To do this, you must stay open and observant. Let exhibitions, books, and the work of other photographers inspire you—but don’t be paralysed by creative envy. Ultimately, your idea must come from within, sparked by a strong emotional response—whether fascination or discomfort. That deep feeling is what drives exploration.
Pompeii lends itself to countless photographic approaches: landscape photography, which highlights the monumental scale of the ruins and the looming presence of Vesuvius; architectural photography, which focuses on lines, geometry, and proportion; documentary styles that trace the site’s evolution; or even a more irreverent, street-style approach inspired by Martin Parr, where tourists become unintentional protagonists.
Like many iconic sites, Pompeii can be interpreted endlessly. Its richness means it will never feel repetitive because each photographer brings unique experiences, tastes, and curiosities. The goal isn’t to chase novelty at all costs, but to follow your instincts. Suppose you’re fascinated by crowds and photographing visitors.
If you’re drawn to shapes, focus on structure. If memory speaks to you, take a documentary angle.
Of course, it’s fine to explore multiple directions. If one creative path stalls, switch to another and return later with renewed energy. In this constant interplay of approaches, you refine your vision. Photographing Pompeii becomes more than documentation—it becomes a way to express your passion and transform the archaeological site into a personal story.

Planning the Photographic Visit
Planning a visit to Pompeii to take great photographs requires some advance thinking. Weather conditions, tourist crowds, and the site’s closing time—often preventing you from capturing the warm evening light—must all be considered. This section will explore how the season, daylight hours, and visitor traffic can significantly influence your photographic opportunities.
Before Leaving
If you want to make the most of your photographic experience in Pompeii, it’s worth planning a few key steps before your trip. First, consider purchasing your tickets in advance: the Pompeii Archaeological Park offers several options, including single-day tickets and annual passes.
If you plan to visit for more than one day or return in the future, a yearly pass may be a particularly convenient choice regarding cost and the flexibility of re-entry. For up-to-date information on pricing and how to book, check the Tickets section of our website, where you’ll also find tips on avoiding queues and choosing the best ticket type for your needs.
Another important aspect is how to get to Pompeii. Located just a few kilometres from Naples, the city is well connected by train, bus, and major roads. By car, the drive takes about half an hour; by train, roughly an hour. The archaeological site opens at 9:00 a.m., so plan your departure accordingly.
For a more detailed discussion of transport options, routes, and timetables, see the article “How to Get to Pompeii” on our website. It will help you decide whether to drive, take the Circumvesuviana local train, or use a tourist bus connecting major Campania sites.
Where you choose to stay will affect your schedule and ability to take advantage of the best light for photography. Staying in Naples offers plenty of nightlife, restaurants, and museums, but it means getting up early to reach Pompeii in time for opening. On the other hand, staying in Pompeii can be a more practical option for photographers: being close to the entrance lets you start your visit right when the gates open, taking advantage of early morning light and fewer crowds.
Before leaving, double-check your camera gear. Ensure your camera is in good working condition, your lenses and sensors are clean, and your memory cards are formatted. Charge all your batteries—especially your spares—to avoid unpleasant surprises during your shoot. If you’re flying, pack your gear in a carry-on-sized backpack to avoid checked luggage issues like extra fees or potential damage (In this guide, we’ll detail what gear to bring).
With these simple preparations, you’ll be ready to immerse yourself fully in the timeless atmosphere of Pompeii and focus entirely on capturing great images.
One final tip—often overlooked but essential—is to check the weather forecast for the days before your visit.
Pompeii is an open-air site, and many walking paths are long and exposed to the elements. Avoiding rainy days, if possible, will make your experience much more comfortable and protect your equipment. While a cloudy sky can offer beautiful lighting for photography, a dry day allows you to explore without hassle.
Best Time to Visit and Recommended Hours
In the summertime, when tourism peaks, Pompeii can turn into a sometimes chaotic place. You may take photos surrounded by many visitors, with less time to study composition and light. True, summer gives longer days and intense sunshine, perfect for bringing out the colours and contrasts between the ruins and the clear sky.
However, the heat can be tiring, and the contrasts between areas of light and shadow can become challenging to manage, especially if you are unfamiliar with manual exposure or HDR techniques.
The fall and winter months offer a different context if you prefer a quieter atmosphere. In the off-season, the excavations are not taken by storm by mass tourism, which allows you to explore architectural details, the interiors of the domus and even the lesser-known alleys more calmly. At the same time, variable weather can provide soft lighting, perfect for enhancing textures and colour nuances, while cloudy skies create an aura of mystery and drama. The downside is that the days get shorter, so you’ll have less time to cover all areas of interest.
Plus, any rain requires you to protect your camera or smartphone better.
Mid-seasons, such as spring and late fall, are often a good compromise: temperatures are milder, there is a balance of light and shade in the middle hours of the day, and tourist numbers, while increasing, do not reach summer levels. At this time, vegetation around the excavations can enrich the background with blooms or warm colours, adding charm to your shots.
For a more in-depth guide on the different months, weather conditions, and holidays that can affect attendance, I recommend reading the article “The Best Time to Visit Pompeii” on our website, there you will find specific details on average temperatures, rainfall, and tourist flow, which will help you more consciously choose the best period for your photography goals.
Whatever time you choose, remember that Pompeii Archaeological Park generally closes in the late afternoon, usually around 5:30 pm. This means that you won’t have the opportunity to photograph the sunset inside the excavations: if you aspire to shoot with evening light, you can only catch it from the outdoor areas or near the entrances.
Remember that the Pompeii Archaeological Park sometimes holds evening events, offering the opportunity to photograph certain parts of the site in a unique nighttime atmosphere. Open areas may be limited to only those affected by the event in these cases.
To find out the dates, access arrangements, and availability of the routes, we suggest you visit the official Pompeii website, where updates on schedules and special events are posted.
Suppose you are planning to spend several days in the area. In that case, you might consider alternating your visit to Pompeii with other nearby destinations, such as Herculaneum or Vesuvius, calibrating your schedule according to your photographic priorities.
Ultimately, choosing the season to visit Pompeii depends on the atmosphere you want to capture and your tolerance for the heat, cold, or chaos of the busier months. There is no perfect time that applies to everyone- the important thing is to know in advance what challenges and opportunities await you.
Plan carefully, consider closing times, and be prepared for a photographic experience that can restore all the magic and history of a place that, after centuries of silence, never ceases to fascinate.
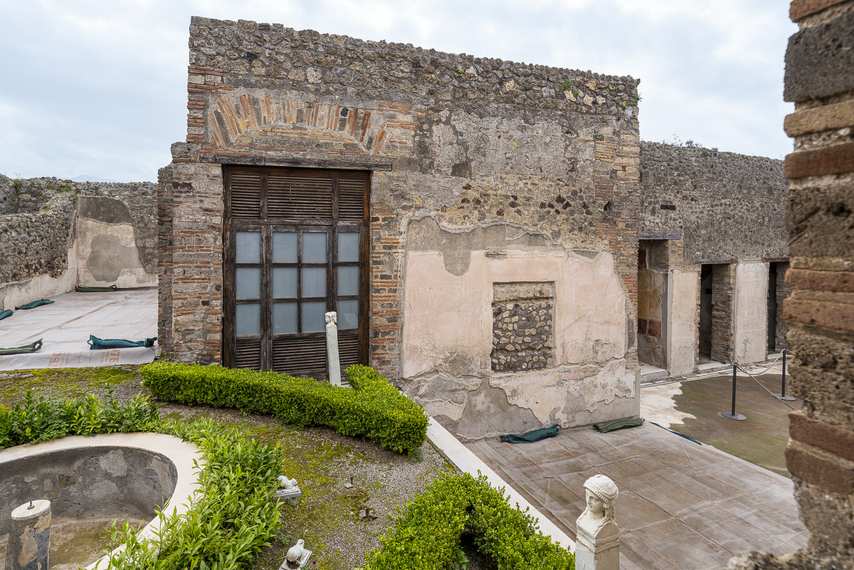
How to Arrange the Visit
Pompeii is an extensive archaeological site. If you only have one day, you’ll likely be able to visit the main highlights, but you risk rushing through them. If you’re pursuing a more in-depth photographic project, it’s worth allocating more time.
The streets, domus, and public buildings deserve careful observation so you can study the light and compose thoughtful shots. Street photography enthusiasts can move quickly in search of candid moments.
At the same time, those focused on landscapes or architecture may need to wait for the right light and frame their shots with greater precision (remember that tripods are not allowed inside the site).
If you plan to explore the suburban villas associated with ancient Pompeii, such as Villa Regina in Boscoreale, the Villa of Poppaea in Oplontis, or Stabiae. In that case, you’ll need even more time. Each of these locations offers unique viewpoints and architectural details that broaden your understanding of life in the Roman world.
Study an Itinerary
To make the most of your time in Pompeii, we recommend studying the suggested itineraries on our website. You’ll find options for short visits, full-day tours, and multi-day explorations. These can be ready-made plans or flexible frameworks for creating your personalised route.
That said, always allow room for the unexpected: some areas may be closed for restoration, others might be too crowded, or you may stumble upon a hidden corner that invites a longer stop than you had planned.
As all photographers know, certain moments become “time traps,” when you linger, fine-tuning the angle or waiting for the right light. A basic itinerary and flexibility will help you stay oriented while leaving space for spontaneous discoveries.
The Map of the Pompeii Archaeological Park
Navigating the Pompeii Archaeological Park can be challenging, given its vast size and the system of Regiones and Insulae (neighbourhoods and blocks used to identify specific areas). For this reason, it’s essential to equip yourself with a detailed map before setting out.
The official Pompeii website offers a downloadable map whose numbering system matches the signs you’ll find throughout the site. Each Regio is marked, and every domus or building is labelled with a number, making identification easy.
We recommend downloading or printing the map in advance so you can study your intended route. With a clear plan, you’ll optimise your time and focus on composing your shots, rather than wandering without direction. That said, be open to improvisation: you may discover a quiet alleyway or an unexpected detail that draws your attention and deserves capture.
Our website features several recommended itineraries, each highlighting key locations and Google Maps coordinates—an invaluable tool when planning or navigating during your visit. Using your smartphone’s free Google Maps app, you can locate recommended sites and create custom routes as you explore.
This helps you follow your plan confidently while allowing for detours along Pompeii’s many roads and points of interest.
A detailed map and accurate coordinates will help you find the spots you want to photograph more easily and approach your visit with greater peace of mind. Pompeii—with its mosaics, architecture, and urban layout—deserves to be explored attentively, and good map preparation can make all the difference in the success of your shoot.
Clothing and Comfort
Visiting Pompeii Archaeological Park requires not only photographic preparation but also attention to physical comfort, which is essential for exploring such a vast and varied site.
Shoes and Hat
The ancient streets of Pompeii can be pretty demanding. The paths are uneven, with large paving stones that make walking tiring and sometimes tricky. Narrow sidewalks and crowds of visitors can add to the challenge. That’s why wearing comfortable, sturdy footwear, such as hiking or trail shoes, is essential.
These will protect your ankles and help prevent injuries, especially if you’re distracted while searching for the perfect angle.
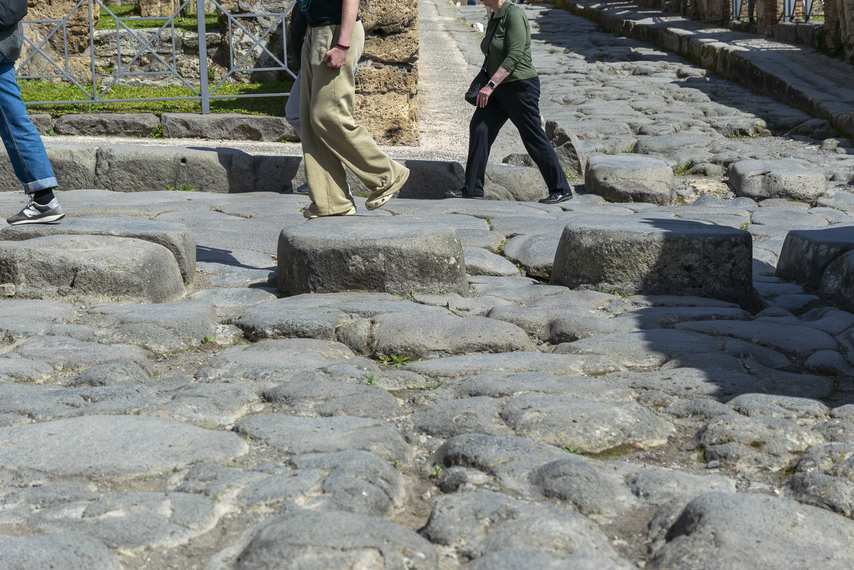
Choosing the proper footwear is just the start. Be mindful of where you step—getting absorbed in your viewfinder is easy, but missteps can lead to sprains or falls. Staying alert helps ensure a safe and enjoyable visit.
A wide-brimmed hat is equally essential in summer and year-round since UV rays can be intense even on cloudy days. Applying sunscreen is highly recommended to protect your skin during long hours of outdoor shooting.
Water and Snacks
Exploring Pompeii is physically demanding, so staying hydrated and energised is crucial. Always carry water with you, whether in bottles or a refillable flask. While there are fountains within the site, both ancient and modern, relying solely on them can waste valuable time.
Bringing a small snack is also a good idea. Energy bars, dried fruit, or a simple sandwich can help you keep going, especially since food services inside the park are limited and often crowded. Plan a quick meal in a quiet area, away from the busiest spots, to save time. Here are a few less-frequented areas where you can comfortably take a short break:
Via di Nola – (Google Maps link)
Castellum Aquae (junction of Vicolo dei Vettii and Via Vesuvio) – (Google Maps link)
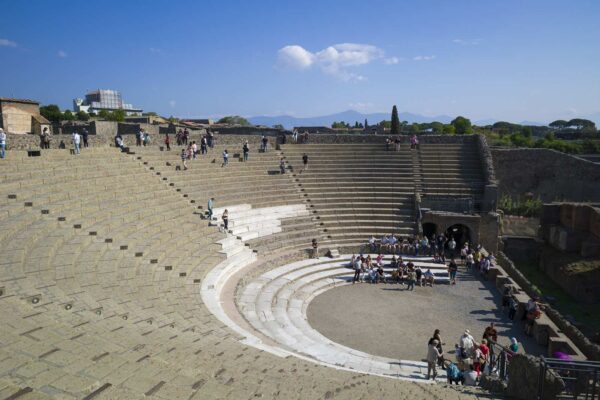
If you don’t mind the presence of other tourists, the Large Theatre is a viable option (Google Map link)
Wherever you decide to stop, be respectful of the site: avoid eating inside the domus or leaning on ancient structures, and never leave waste or personal items on archaeological surfaces.
It’s also important to note that, like most archaeological sites, Pompeii does not allow visitors to consume food freely throughout the park. There are no designated picnic areas, and breaks should be taken only in shared open spaces without obstructing visitor flow.
Avoid eating inside the domus or leaning on ancient walls and structures, and never place food or personal items on archaeological surfaces. These simple precautions protect the site’s historical and cultural integrity.
After a full day of exploration and photography, consider treating yourself to a relaxing dinner. Pompeii offers excellent local restaurants to satisfy your appetite.
On our website, in the article “Where to Eat in Pompeii”, you’ll find helpful recommendations for the best trattorias and dining spots—so you can enjoy a pleasant, well-deserved evening after immersing yourself in the wonders of this extraordinary archaeological site.
Safety Tip: Never leave your camera gear unattended. If you stop to eat, keep your backpack between your legs, not beside you, to prevent theft or accidental damage. Protecting your equipment is just as crucial as capturing great images.
Photographic Equipment: What to Bring and Why
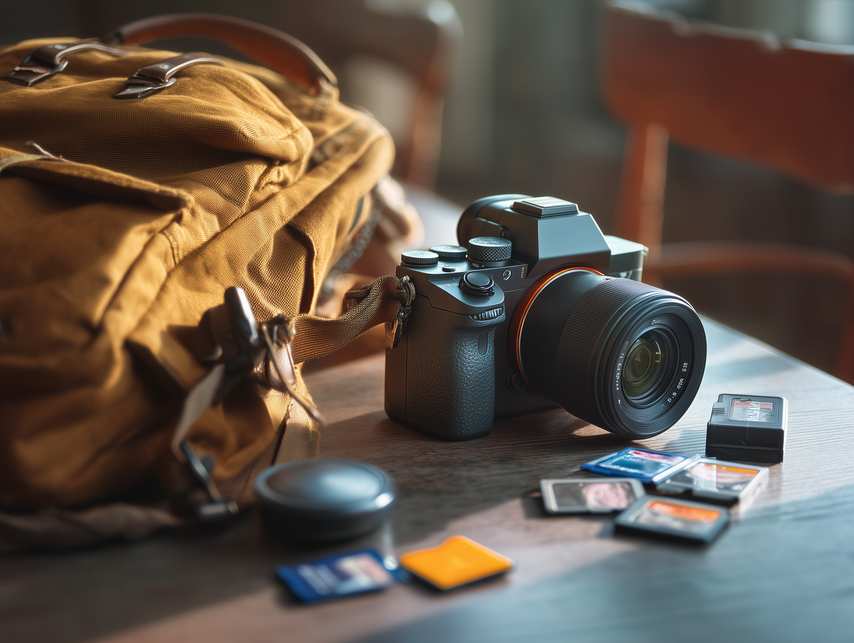
Travel Light
Travelling light is essential for enjoying your visit to Pompeii for practical reasons and to comply with park regulations. Large backpacks must be stored at the entrance, so carrying only what you truly need is essential. A minimalist kit doesn’t limit your creativity; it can sharpen it.
Carrying less forces you to make thoughtful decisions about your subject matter and timing, and helps you avoid the temptation of taking too many unfocused shots.
Pompeii is vast, and its terrain is uneven. You’ll walk long distances on ancient cobblestones and narrow sidewalks. Add to that the summer heat or crowds, and it becomes clear that a lightweight approach is key. Good hiking shoes and a compact backpack will make a massive difference in safety and comfort, allowing you to move quickly and confidently.
We recommend always keeping your camera in your hand, secured with a strap around your neck or shoulder (with the lens facing inward to protect it). This reduces the risk of theft or accidents and frees up space in your bag for essentials like water and snacks. Less gear also means fewer distractions, so you can focus entirely on your creative process and react quickly to visual opportunities as they arise.
Adopting a minimalist mindset leads to greater efficiency and creative control. Every piece of gear becomes part of your artistic vision, and you can move more freely through the ruins without being weighed down by unnecessary equipment. In short, travelling light helps you stay mobile, alert, and focused—so you can create images that capture the essence of Pompeii.
Recommended Cameras and Lenses
The Camera
Given the vast range of cameras available today, it isn’t easy to offer a one-size-fits-all recommendation. Most likely, any photography enthusiast planning a visit to Pompeii already owns a camera chosen according to personal preferences and previous experience.
This principle applies to all photographic equipment: the more comfortable, compact, and lightweight your gear is, the better your experience will be, especially in a complex and physically demanding setting like the Pompeii Archaeological Park.
Whether you use a DSLR or a mirrorless camera, what truly matters is how well you know your device. Being familiar with your camera enables you to maximise its capabilities, including managing its limitations.
For this reason, we encourage you to rely on the camera that best matches your photographic style, rather than chasing the idea of the “perfect camera”—a concept that is often subjective and tied to personal experience.
We won’t delve into the technical differences between camera models, because a practical choice depends on the quality you aim to achieve, the nature of your project, and how well you handle your equipment. If you are confident using your camera—whether in automatic or manual mode—you’ll be able to adapt to the site’s various lighting challenges and take full advantage of creative opportunities.
In our view, the most critical factor affecting the final quality of your images is not the model itself, but how skillfully you use it.
Travelling with a camera that won’t weigh you down during long walks over uneven terrain is always best and can be easily handled in narrow or crowded spaces.
It’s also worth noting that certain features—like a clear viewfinder or an intuitive interface for adjusting settings—can be far more valuable than the countless extras offered by high-end models.
While expensive cameras provide advanced options not available in budget-friendly alternatives, the real deciding factor is practicality and how seamlessly the device fits into your workflow. A camera you know well allows you to focus on composition and creativity rather than struggling with unfamiliar interfaces or overly complex features.
In summary, choosing the right camera for your visit to Pompeii should be guided by comfort, familiarity, and usability.
Understanding your tool—its strengths and limits—will help you face environmental challenges and focus on capturing meaningful images that celebrate the site’s historical richness with passion and precision.

Lenses
A standard 24–70mm zoom lens (or 16–55mm for APS-C sensors) is versatile. Pompeii presents various situations—from sweeping vistas like the Amphitheatre or the Large Theatre, to narrow interiors and fine architectural details. A flexible zoom allows you to adapt quickly without changing lenses frequently, which is especially helpful in tight or crowded spaces.
Some photographers prefer fixed focal length (prime) lenses for their optical performance, and that’s a valid choice—provided you’re comfortable working within a single field of view. Changing lenses too often can slow you down and increase the risk of damage, especially in a busy site like Pompeii.
A macro lens (typically 90–100mm) can offer a fresh, refined perspective to capture intricate frescoes or decorative details. That said, switching lenses adds weight and requires time, so bring it only if it aligns with your project goals.
Whatever lens you choose, opt for models with wide apertures—f/2.8 or wider (such as f/1.4), ideal for photographing inside a domus, where light is limited and flash is not permitted. Bright lenses help you shoot in low-light conditions without pushing ISO too high or risking blurry shots from slow shutter speeds. Fast primes excel here, although some bright zooms can also perform well.
If your camera has auto mode, keep an eye on shutter speed—try not to dip below 1/80s to avoid motion blur. When necessary, increase the ISO but remain aware of image noise. Balancing aperture, ISO, and shutter speed is crucial to maintaining low-light quality.
For advanced photographers who prefer a minimal kit, a single wide-angle prime, such as a 28mm or 24mm lens, is a solid option. These lenses offer excellent sharpness, low-light performance, and the ability to create intense compositions, especially in confined or dark interiors. Limiting yourself to one focal length may seem restrictive, but it encourages creative framing and helps you develop a distinctive photographic voice.
Choosing the right gear for Pompeii balances practicality, image quality, and personal style. A well-curated, lightweight kit lets you move freely and focus entirely on storytelling, capturing the layers of history that make this site so extraordinary.
Other Useful Accessories
Visiting a site of such magnitude as Pompeii, where every detail stimulates creativity and invites you to take numerous photos, requires providing a range of accessories that ensure efficiency, safety, and high-quality images. This section will examine some of the most useful accessories to take with you, offering support in organising data and protecting your equipment.
Additional Memory Cards
The beauty of Pompeii, from the majesty of the mosaics to the subtle details of the architectural remains, will prompt you to take hundreds of shots. It is therefore essential to bring extra memory cards with you.
Personal preferences vary: some photographers opt for many smaller capacity cards to divide work into small blocks and reduce the risk of total loss in the event of a malfunction. In contrast, others prefer a few large-capacity cards. If your camera has dual slots, consider allocating one for automatic backup so that every shot is duplicated for added security.
Backup Batteries
The number of pictures you’ll take in Pompeii requires careful energy management. One battery is unlikely to last a full day of intense shooting. We recommend that you always carry at least one fully charged backup battery.
This expedient will allow you not to interrupt your photo session abruptly and to maintain the pace of your work without having to worry about recharging on site, since the possibilities of charging a battery during a visit are minimal.
Metal Lens Hood
The metal lens hood might seem superfluous, but it is handy in photographic practice. In addition to preventing unwanted reflections due to backlighting, the lens hood protects the lens from accidental impacts.
In the tight, crowded spaces of excavations, where the risk of collision with furniture, columns, or other equipment is always present, having a fitted lens hood can make all the difference by protecting your precious lens.
GPS Module
If your camera allows it, using a GPS module to geotag each shot can be very convenient, especially if you are doing a documentary project or mapping specific locations in Pompeii.
Although this accessory consumes a fair amount of battery power, the recorded coordinates will allow you to precisely trace the location from which you took the photo, a significant advantage in a large and intricate area. Alternatively, to remember where you captured an image, you can take a picture of the information sign at the entrance to the domus.
However, this method is not applicable for exterior shots: in this case, you will have to rely on plaques on some streets that indicate the Regio and Insula reference.
Polarizing Filter
A polarising filter is a valuable ally for improving contrast and reducing reflections. In some areas of excavations, there are statues, casts and mosaics protected by thick glass panes that, while preserving these valuable ancient artefacts, generate unwanted reflections that can compromise image rendition.
Even if it results in losing one or two f-stops of light, a polarising filter can eliminate these reflections, ensuring sharper, more balanced shots. If the polariser you own is compatible with your chosen lens, take it with you- it will come in handy in numerous situations.
Lens and Sensor Cleaning Kit
Keeping your equipment clean is essential to achieving high-quality images. A cleaning kit, including microfiber cloths, lens-specific liquid, and small brushes, will allow you to remove dust, fingerprints, and stains that could compromise your photos.
While visiting, frequent environmental changes and exposure to outdoor conditions may make periodic cleaning necessary, so don’t hesitate to take a break to care for your instruments.
Keep in mind, however, that if you are outdoors, it is advisable to perform more delicate tasks, such as cleaning the sensor or the inside of the lens, only in sheltered places and only if strictly necessary. Whenever possible, favour a hotel or an enclosed environment as the safest place to perform all maintenance tasks to prevent dust or moisture from entering the camera.
Waterproof Case or Protective Cover
Finally, consider purchasing a waterproof case or protective cover for your camera. Weather conditions in Pompeii can be unpredictable, and in the event of rain or excessive humidity, proper protection will allow you to not worry about damage and to continue shooting without interruption.
A good cover can be easily stowed in your backpack when unnecessary, offering solid protection against the elements.
Having the right accessories is a wise investment in your comfort and the quality of your photography. With a carefully chosen kit, you can fully enjoy Pompeii’s creative possibilities while protecting your equipment and making your process efficient.
Essential Photo Checklist for Pompeii
To help you pack efficiently and avoid forgetting crucial items, we’ve compiled a complete checklist for your photographic day at the Pompeii Archaeological Park. This list prioritises comfort, practicality, and the protection of your gear, whether you’re shooting with a DSLR, mirrorless camera, or smartphone.
| Technical equipment and accessories |
|---|
| Lightweight and compact camera (DSLR or mirrorless) |
| Versatile zoom lens (e.g., 24–70mm or 16–55mm for APS-C) |
| Bright fixed lens (e.g., 28mm or 24mm) as an alternative to a zoom |
| Macro lens (optional, for close-up details) |
| Metal lens hood (for protection and glare reduction) |
| Polarizing filter (if compatible with your lens) |
| Extra memory cards |
| At least one fully charged spare battery |
| Battery charger (for hotel use) |
| GPS module (optional, for geotagging photos) |
| Charged smartphone with Google Maps and a photography app |
| Power bank and charging cable for smartphone |
| Smartphone earphones (if needed) |
| Lens cleaning kit: microfiber cloths, cleaning liquid, small brushes |
| Map of the Excavations (printed or saved to your phone) |
| Spare cloth for lens or screen cleaning |
| Water bottle or flask (filled) |
| Light snacks (energy bar, dried fruit, or sandwich) |
| Hand wipes or sanitizing gel |
| Waterproof case or rain cover for backpack and gear |
| Comfort and safety |
|---|
| Comfortable hiking or walking shoes (essential on uneven surfaces) |
| Wide-brimmed hat or cap (for sun protection) |
| Sunscreen (high protection, even on cloudy days) |
| Layered clothing suited to the season (light for summer, warmer for winter) |
| Light waterproof jacket or windbreaker (in case of rain) |
| Sunglasses (recommended in bright weather) |
| Lightweight backpack with padded straps (to carry gear and supplies) |
| Travel insurance covering equipment and personal health (recommended) |
What Not to Bring
As we have repeatedly said inside the Pompeii Archaeological Park, it is essential to travel with the minimum necessary equipment.
The first rule to know and follow is that using a tripod is not allowed: if you bring it, you will be asked to deposit it at the entrance, slowing down your journey. Similarly, flash is prohibited inside the domus, where artificial lighting can compromise the integrity of the frescoes and the historic environment.
Avoid carrying bulky or unnecessary accessories that cannot be used in confined spaces or situations of constant movement.
Many photo kits include duplicates and gadgets that, in a place like Pompeii, weigh more than they help. Choose only the essential tools to get the shots you have in mind; focus on the quality of the images rather than the amount of equipment you need to carry.
Do not bring non-essential devices, such as tablets or laptops, as they may disrupt your visit and contribute to overloading your luggage, unless they are strictly necessary for your work or photography project.
Consider using them at the hotel and avoid taking them with you while exploring the site. The goal is to operate lightly and nimbly, respecting the limitations imposed and maintaining maximum mobility in corridors and interior areas.
Complex stabilisation tools, cumbersome external lights, or accessories that take a long time to set up risk interfering with the speed of your movements and the freedom to explore the area.
Remember that simplicity favours authentic, good-quality shots: an essential setup allows you to move freely through the ancient streets and capture every detail without interruption.
Abiding by the site’s rules and minimising the weight of your equipment will immerse you entirely in the photographic experience in Pompeii, focusing solely on your creativity and the beauty of the historic heritage.
An additional aspect to consider concerns the use of drones. Inside the Park, it is forbidden to use a drone without obtaining specific permission from the site administration. This rule is essential to protect the archaeological heritage and ensure the safety of all visitors.
Later, in the section “Rules and regulations within the Pompeii Archaeological Park,” we will elaborate on this topic and provide the link to apply for permission if you are interested. Paying attention to these restrictions is essential to comply with park guidelines and help preserve this unique heritage.
Tips on Shooting Settings (SLR/Mirrorless)
Before concluding the section on photographic equipment, here are a few essential tips on configuring your DSLR or mirrorless camera when photographing at the Pompeii Archaeological Park. These suggestions are handy for beginners unfamiliar with adjusting settings in such varied environments, although more experienced photographers may still find them a helpful reminder.
Shooting in Aperture Priority mode is a good idea when working in a place like Pompeii, where lighting conditions can shift quickly between sun-drenched ruins and dark interior spaces.
This semi-automatic setting lets you choose the aperture while the camera automatically adjusts the shutter speed.
For indoor scenes, where light is limited, opt for wide apertures such as f/1.4 to f/2.8 to let in as much light as possible. In the outdoors, especially in brighter conditions, narrower apertures can help increase the depth of the field.
Constantly monitor your shutter speed, particularly when shooting handheld. A speed below 1/60s (ideally not below 1/80s) increases the risk of motion blur caused by even minor hand movements. Many images that appear out of focus are blurred due to this micromovement, not poor focusing.
To avoid this issue, hold your camera with both hands, keep your elbows close to your body, and use any nearby surface, such as a wall or column, to steady yourself if necessary. If you’re forced to use a slower shutter speed, stabilising your posture becomes even more critical.
If your camera has it, enable Auto ISO. This setting allows the camera to raise the ISO in low-light conditions, maintaining a faster shutter speed and reducing the chances of blur. However, be mindful of the trade-off: higher ISO values can introduce image noise, so adjust your maximum ISO limit according to your camera’s performance.
Another technical challenge in Pompeii is the high contrast between light and shadow, especially in open courtyards or under intense midday sun. In these situations, it’s better to expose for the highlights to prevent blown-out areas. Instead of using the default evaluative (matrix) metering mode, try spot metering to measure light precisely in a small area, such as a sunlit wall or bright floor.
Aim at the brightest part of the scene, half-press the shutter to lock the exposure, then recompose and shoot. This technique helps protect details in the highlights, even if it means sacrificing some shadow information.
By keeping these settings in mind—balancing aperture, shutter speed, ISO, and metering—you’ll be better equipped to handle Pompeii’s diverse lighting and compositional challenges. With practice and a thoughtful approach, every frame can become a vivid, well-exposed tribute to this extraordinary site.
Photographing Pompeii with a Smartphone
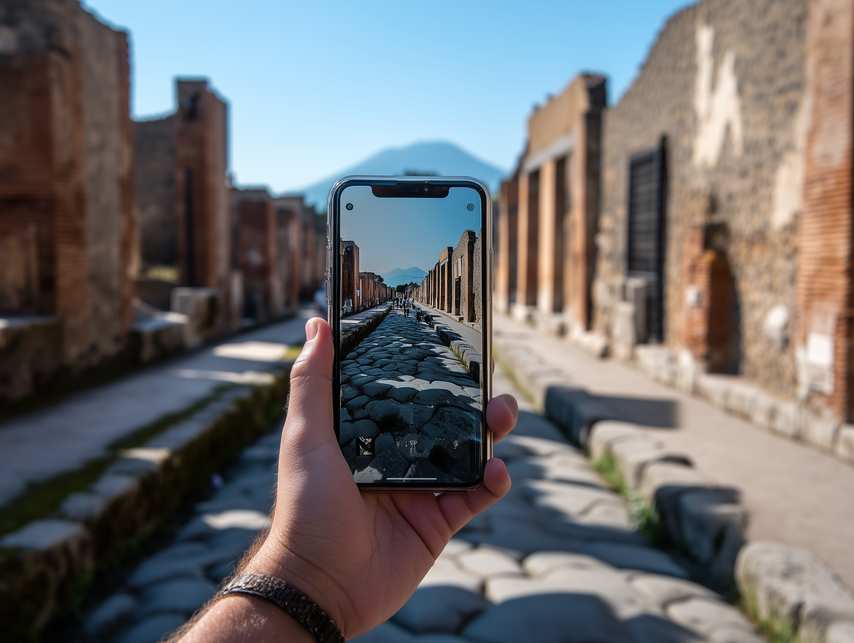
The beauty and complexity of the Pompeii Archaeological Park are not reserved for those with professional cameras. A modern smartphone can be an exceptionally powerful tool, offering practicality, speed, and surprising image quality, primarily when used with care and awareness, despite the complexity of the site.
The compactness of the phone, combined with the speed of use, allows for greater agility and discretion, which are essential elements in such a dynamic and detailed environment.
Why Use a Smartphone
Using a smartphone to photograph Pompeii offers immediate advantages in terms of portability and discretion. Lightweight and compact, it allows you to move easily through narrow alleyways and crowded spaces, without the burden of bulky gear. Its unobtrusive nature is particularly valuable in a cultural heritage site, where respecting the setting and other visitors is essential.
Another significant benefit is the built-in GPS, which automatically lets you geotag your shots.
This is especially helpful if you’re working on a documentary project or want to reconstruct your path through the site. Having coordinates embedded in your files makes organising and revisiting your images much easier.
Modern smartphones also have advanced built-in camera apps with automatic features like HDR, scene recognition, and exposure adjustment. These functions effectively handle complex lighting conditions, such as the shadows inside a domus or the intense sunlight in open courtyards, without requiring manual settings.
Finally, a smartphone encourages spontaneity. It’s always ready to shoot, ideal for capturing fleeting moments, unexpected scenes, or casual portraits. This agility lets you tell a more dynamic and personal story of your experience at Pompeii.
Sharing and Social Interaction
Smartphones make sharing your shots in real time via social media or messaging apps easy. This instant interaction can be a fun and engaging way to document your journey. That said, we recommend waiting until after your visit—or at least until you take a break—to review and post your images. Being present during your walk through Pompeii will help you better connect with its history, architecture, and atmosphere.
In Summary
With its convenience, versatility, and technical capabilities, the smartphone is a legitimate and effective photographic tool for exploring Pompeii. Whether you’re a casual visitor or a passionate storyteller, it allows you to document the site creatively, intuitively, and with minimal equipment, proving that a meaningful photograph is more about the eye than the gear.
Basic Tips for Better Shots
When photographing Pompeii with a smartphone, a few simple techniques can significantly improve the quality and visual impact of your images.
Start by mastering composition and light. One of the most effective tools is the rule of thirds. Activate the grid in your camera settings to divide the screen into nine equal parts. Placing key subjects along the lines or at their intersections helps create balanced, engaging compositions.
Use the tap-to-focus feature to control both focus and exposure. Tapping on brighter or darker areas of the scene allows you to adjust the camera’s metering in real time. This is especially useful in settings with dramatic contrast, such as shadowed interiors or sunlit ruins, where automatic exposure may not capture details accurately. Tap strategically to prevent blown-out highlights or overly dark shadows.
When framing distant subjects, avoid excessive digital zoom. It tends to degrade image quality by introducing blur and noise. If possible, physically move closer to your subject. This ensures sharper, more detailed photos.
Portrait mode is another creative option. It is ideal for isolating a subject, such as a statue, column, or decorative feature, by creating a soft background blur. It’s particularly effective in crowded scenes where you want to draw attention to a single element. Just be sure to preview the effect: some devices may overprocess the image, so experiment until you find the right balance.
To handle strong contrasts between light and shadow, enable automatic HDR (High Dynamic Range) if your phone supports it. This feature blends multiple exposures into a single image, preserving details in both highlights and shadows. While generally effective, HDR can occasionally produce unnatural results, so always review your images afterwards and consider minor adjustments in post-production.
Finally, hold your phone steady when taking a photo. Use both hands, brace your arms against your body, or rest the phone on a stable surface. For even greater stability, consider using the self-timer to eliminate movement from pressing the shutter button, which is especially useful in low-light settings where longer exposure times increase the risk of blur.
With just a few of these practical techniques, your smartphone shots can match the richness and atmosphere of Pompeii itself, transforming casual snapshots into powerful visual memories.
Third-Party Apps
To take your smartphone photography at Pompeii to the next level, consider using third-party camera apps that offer more advanced manual controls than the default camera software. These apps allow you to fine-tune exposure, ISO, shutter speed, white balance, and focus, making them especially useful in environments with challenging light and contrast, like those found among ancient ruins.
One of the most popular choices for iOS users is Halide. Known for its elegant interface and intuitive layout, Halide gives you complete manual control while maintaining a smooth, responsive experience. It’s ideal for photographers who want to shoot in RAW, control exposure precisely, or take advantage of focus peaking and histograms for better image quality.
If you use Android, two excellent alternatives are Camera FV-5 and Open Camera. Camera FV-5 offers a professional-level control panel and supports advanced features like exposure bracketing and long exposure. At the same time,
Open Camera is a highly customizable, open-source app that’s light on resources and free to use. Both are well suited to situations where light conditions vary dramatically, such as inside the domus or in shaded courtyards.
These apps give you more flexibility in handling difficult scenes, allowing you to capture better-balanced images and express your creative vision more freely. For example, manually setting a slower shutter speed and lower ISO means less noise in your photos—an advantage in low-light conditions, especially when you can steady your device.
In short, if you’re serious about mobile photography, these third-party tools transform your phone into a powerful creative instrument, bridging the gap between casual shooting and professional results.
Rules and Regulations within the Pompeii Archaeological Park
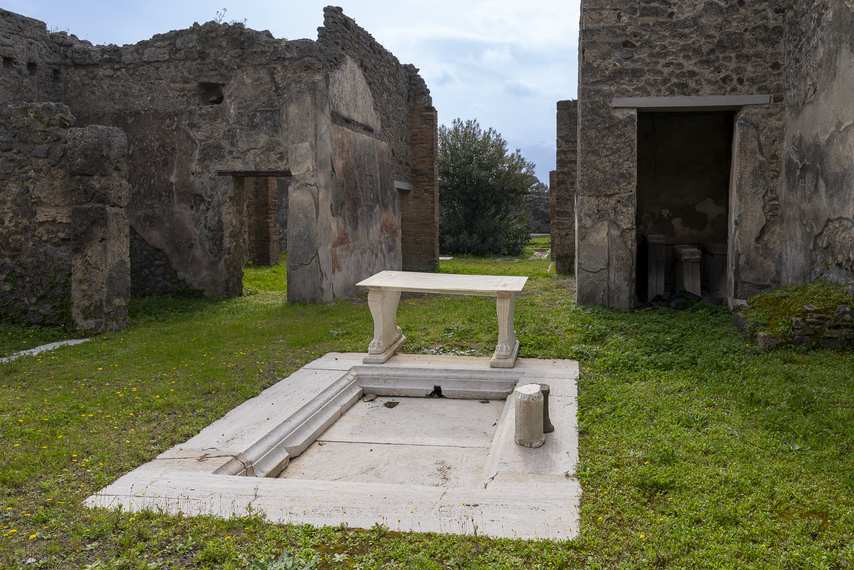
Before visiting the Pompeii Archaeological Park, it’s important to know a few essential rules designed to protect this extraordinary site and ensure a respectful, safe experience for all visitors. These guidelines apply in particular to photography, the use of technology, and appropriate behaviour within the archaeological site.
To photography, the use of technology, and proper behaviour within the ruins.
We recommend you regularly consult the Pompeii Archaeological Park’s official website, as regulations and procedures may be updated or changed without notice.
Photography and Video
Amateur photography and video are generally permitted throughout the park if you follow a few key restrictions. Tripods and flashes are prohibited, especially indoors, where artificial lighting could harm delicate frescoes and architectural surfaces. These limitations help preserve the visual and material integrity of the ancient remains.
If you plan to take photographs for commercial use, publications, exhibitions, or other professional projects, you must obtain prior authorisation from the park authorities. This process includes submitting a formal request and, in some cases, paying a fee. Unauthorised commercial reproduction of images is prohibited.
Reproducing Cultural Property
Any reproduction of cultural property—whether frescoes, mosaics, sculptures, or architectural elements—is subject to Italian heritage protection laws. Personal or educational purposes are generally allowed, but all commercial use must be pre-approved. This policy ensures that cultural heritage is treated with the respect and care it deserves.
Drone Use and Aerial Photography
Using drones or remotely piloted aircraft systems (SAPRs) within the archaeological area without explicit written permission is strictly forbidden. This restriction protects both the site and the visitor’s safety. If you wish to apply for drone access, you must follow the official procedure provided by the site administrators.
Forms and further information are available on the Pompeii Archaeological Park’s official website under the Permits and Forms section.
Respect for the Site
The ruins of Pompeii are a fragile and irreplaceable cultural asset. All visitors are expected to behave with care and responsibility. Do not touch, lean on, or climb ancient structures. Avoid entering restricted areas or veering off designated pathways. Never remove stones, fragments, or any object from the site—doing so is illegal and legally punishable.
When photographing, please avoid obstructing walkways or disturbing other visitors. If you’re setting up a shot, step aside when crowds pass and avoid blocking entrances or narrow alleys.
These rules are not simply formalities: they are vital for the long-term preservation of the site and for allowing future generations to enjoy and study it. A conscious, respectful approach to your visit enhances your experience and that of everyone who walks through this ancient city.
The Best Photo Spots in Pompeii
Overview Views

Pompeii has breathtaking locations that lend themselves perfectly to photography, from panoramic cityscapes to intimate architectural details. Knowing where and when to shoot can significantly enhance your experience and help you return home with images that capture the site’s essence.
The Forum of Pompeii (Google Maps link) is a must for wide, dramatic shots that convey the scale and atmosphere of the ancient city. Here, the ruins frame the imposing silhouette of Mount Vesuvius, offering a powerful and symbolic composition.
Early morning is the best time to photograph the Forum, as the soft light accentuates textures and reduces the presence of tourists. Want to learn more about one of the most iconic spots to photograph? Discover its history and architectural details in our dedicated article on the Forum of Pompeii.
Since the Forum is one of the most visited areas, we recommend entering through the Porta Marina Superiore (Upper Marine Gate) entrance (Google Maps link). From there, it’s about 130 meters along Via Marina to reach the Forum. Arriving at opening time lets you enjoy the space in relative peace and capture clean, unobstructed images.
Another iconic setting is the Large Theatre (Google Maps link), with its grand stone seating and impressive architectural scale. The best light here arrives in the morning or early afternoon, creating dramatic shadows that emphasise the structure’s geometry.
To reach it with minimal crowds, enter from the Piazza Esedra entrance (Porta Marina Inferiore) (Google Maps link) and proceed along Viale delle Ginestre through the Quadriporticus of the Theatres (Google Maps link). Curious about one of the most atmospheric places to capture on camera? Explore the history and secrets of the Large Theatre of Pompeii in our detailed article.
Additional panoramic opportunities include the terrace in front of the Antiquarium (Google Maps link), which offers a striking view of the surrounding landscape and nearby Porta Marina, as well as the Temple of Apollo (Google Maps link) and the Temple of Venus (Google Maps link), which feature photogenic ruins framed by columns and open skies.
Outside the main excavation area, sites like Villa Regina in Boscoreale (Google Maps link) and the Villa of Poppaea in Oplontis (Google Maps link) provide beautiful, less crowded alternatives. Their combination of architectural elements and surrounding greenery creates compelling contrast and compositional opportunities.
Different times of day reveal new details and lighting effects, so it’s worth revisiting favourite spots under changing conditions.
Artistic and Architectural Details
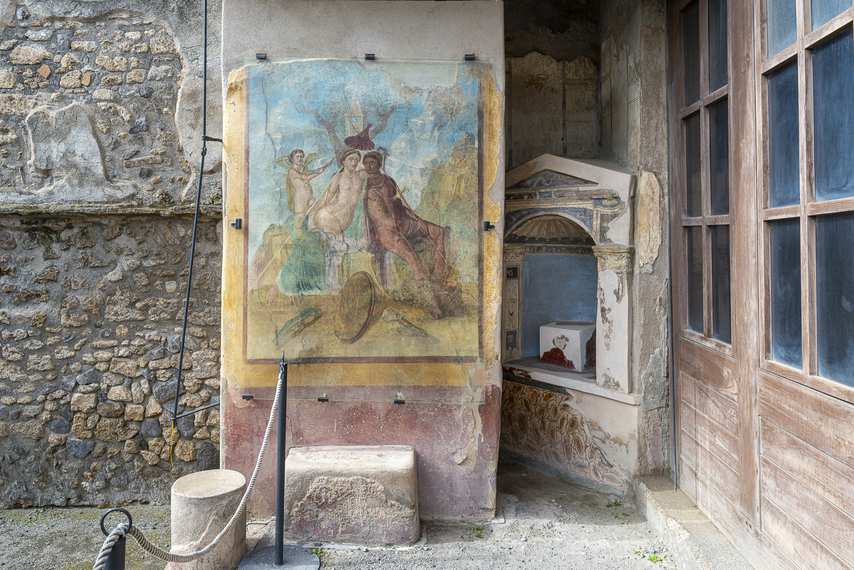
For photographers interested in intricate details, Pompeii’s domus and villas are filled with frescoes, mosaics, and ornamental architecture that speak volumes about Roman daily life and aesthetics.
The House of the Silver Wedding (Google Maps link) is known for its frescoes depicting themes of marriage and fertility. Rich in colour and decoration, this domus offers refined compositions that pay homage to Roman artistry.
One of the best-preserved residences, the House of the Vettii (Google Maps link), features mythological scenes and vivid narrative frescoes that tell stories of passion, power, and domestic life. Its well-structured rooms and carefully planned decoration offer multiple layers for storytelling through photography.
At the House of the Wounded Bear (Google Maps link), don’t miss the famous entrance mosaic depicting a bear pierced by a spear—an image filled with emotion and symbolism. The surrounding rooms, painted in Fourth-Style frescoes, provide varied textures and colours ideal for detail shots.
The House of the Red Walls (Google Maps link), known for its deep red hues and intimate layout, offers a warm, dramatic atmosphere that varies beautifully throughout the day.
Equally impressive is the House of the Dioscuri (Google Maps link), where depictions of Castor and Pollux, among other mythological subjects, showcase artistic finesse and rich symbolic meaning.
Finally, the Villa of the Mysteries (Google Maps link) is a favourite among photographers. Its well-preserved frescoes vividly depict mysterious rites, enhanced by natural light streaming through the space. The result is a mystical atmosphere connecting perfectly to creative, expressive photography.
These interiors invite you to document and interpret history visually, telling stories through colour, texture, light, and form. Each room, corridor, or courtyard presents new possibilities for unique images, offering endless inspiration for documentary and artistic approaches.
Special Sceneries
Beyond the grand architecture and well-known monuments, Pompeii offers countless hidden corners and unexpected views that reward the curious eye. These memorable scenes are often found in quiet side streets, partially enclosed gardens, or through gates and grilles that frame scenes like natural vignettes. These less-travelled areas can become the journey’s most personal and evocative parts for a photographer.
Some of the most intriguing photographic opportunities come from playing with layers and perspective.
For example, looking through a locked gate or between columns can create a natural frame that adds depth and mystery to the shot. Reflections in ancient water basins, shadows cast across frescoed walls, or a sudden burst of light entering a narrow room can all transform a simple composition into something magical.
These scenes are often not listed in guidebooks. They emerge through slow observation, patience, and a willingness to get off the main routes. While many areas may not be fully accessible, simply walking attentively—pausing often, changing your angle, or returning at a different time of day—can reveal intimate and unique moments.
To encourage this spirit of discovery, we’ve included a few Google Maps coordinates on our website—places where interesting scenes have been observed. We don’t specify exactly what to expect, because part of the magic of Pompeii lies in this visual treasure hunt. Let your creativity guide you, and be open to surprises.
By seeking out these quieter spaces, you’ll uncover great photographs and a more personal connection to the site.
These small, quiet moments—half-light on an abandoned threshold, a weathered column surrounded by silence, or a wildflower growing through ancient stone—tell stories as powerful as those found in Pompeii’s grand forums and theatres.
Dealing with Crowds
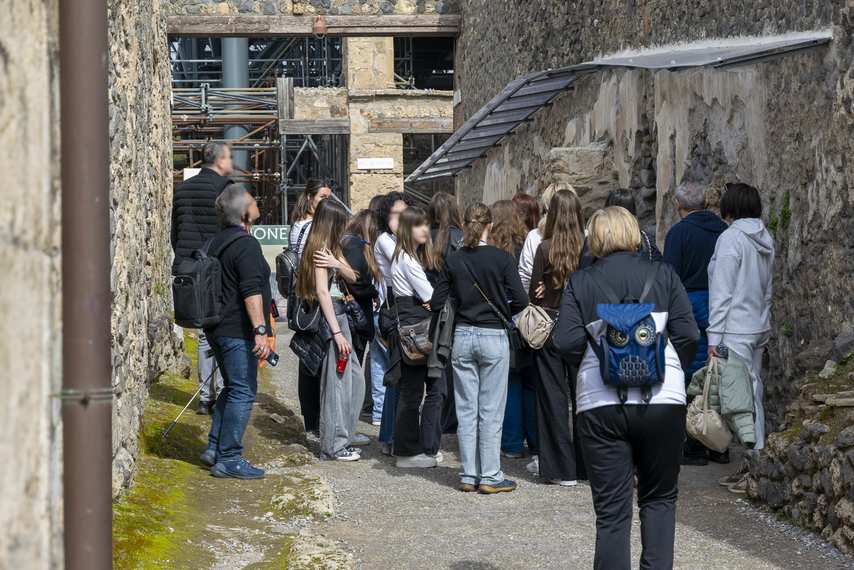
Visiting Pompeii Archaeological Park is a remarkable experience. Still, large numbers of tourists can make capturing clean, unobstructed shots challenging during peak seasons and in the most popular areas. Knowing how to manage crowds—both in the moment and in post-production—can make all the difference in your photography.
During high season, key sites like Via Marina, the Forum, and Via dell’Abbondanza often teem with visitors. These are historically rich and visually striking areas, but the density of people can interfere with composition and limit your ability to isolate architectural features or capture stillness.
One of the most effective strategies is to plan your visit around timing. Arrive early, ideally when the park opens, to enjoy soft light and quieter paths. Early mornings often provide the most favourable conditions—not only for light, but also for photographing empty spaces before groups arrive. If you can’t be there first, consider returning to key locations during lunch hours or when guided tours are transitioning between stops.
If you have a specific subject in mind, such as the Garden of the Fugitives, plan your route accordingly.
For example, entering through the Amphitheatre Gate and heading directly to your chosen spot gives you the best chance to photograph it undisturbed. The general rule is simple: the more famous the location, the earlier it will attract crowds.
Sometimes, a little patience goes a long way. Waiting a few extra minutes can be the key to capturing an unobstructed scene.
Observe how groups move, and be ready to shoot in the brief gaps between them. You might also find success exploring lesser-known areas of the site, which often provide equally compelling images with fewer distractions.
Post-production offers powerful tools to clean up your images when crowds are unavoidable. Software like Adobe Photoshop or Lightroom can help remove unwanted elements. Photoshop’s “Content-Aware Fill” tool can seamlessly reconstruct areas where tourists were present, while Lightroom’s spot removal tool is ideal for fixing minor distractions.
Use these techniques carefully to maintain the integrity and realism of your composition.
While Pompeii may be a bustling tourist destination, intelligent planning, adaptability, and editing finesse can help you create timeless and undisturbed images, allowing the ancient city to speak clearly through your lens.
Backup, Post-Production and Archiving
Careful backup management and file organisation are essential for any photographer visiting the Pompeii Archaeological Park, especially if your visit spans multiple days.
Once you return to your hotel, take the opportunity to back up the photos you captured during the day. If you have a laptop with you, connect it to an external hard drive and copy over your images, then use the hotel’s Wi-Fi to sync your files with a cloud service such as Google Drive, Dropbox, or iCloud.
This dual approach—local and cloud backup—protects your files against hardware failures or accidental loss.
If you’re not travelling with a laptop, portable backup devices such as the WD My Passport Wireless SSD, designed to back up files directly from memory cards, are available. These tools allow you to quickly transfer and safely store your photos, freeing up space on your cards so you can continue shooting without worry. Use these solutions to guarantee a secure copy of your images, especially if you’re staying in Pompeii for several days.
Once you’re back home, organise your photos by creating a structured folder system, categorising your files by date, location, or event.
This approach makes it easier to find specific images later on and helps you create a coherent visual narrative of your experience. Use cataloguing software like Adobe Lightroom or Capture One to import and sort your shots efficiently.
When it comes to post-production, start with basic adjustments that enhance the creative potential of your images. Begin with light and shadow balancing: adjust exposure and contrast to ensure that highlights are not blown out and that shadowed areas retain detail.
Careful white balance correction is also crucial for maintaining the historical accuracy of tones, especially since many indoor shots inside the domus may appear too cool or warm without proper adjustment.
Once the technical corrections are complete, move on to creative editing to enhance the visual impact. Tweak colours and tonal curves and use local adjustment tools to improve problem areas in specific image parts.
If unwanted elements—such as people interfering with the composition—are present, use advanced editing tools like Photoshop’s Content-Aware Fill or Lightroom’s Spot Removal to eliminate them. Always remember: even when cleaning up distractions, you aim to preserve the site’s authentic atmosphere.
In summary, safety (backup), order (categorisation), and image enhancement (editing) form a reliable and effective workflow.
This approach not only protects your work but also helps you build a cohesive and lasting photographic collection capable of conveying the history and energy of this extraordinary archaeological site for future generations.
Tips for Photographic Storytelling
Project Introduction and Planning
Creating a photographic project about Pompeii means engaging with a site rich in history and atmosphere, offering endless opportunities for visual storytelling. Compelling storytelling doesn’t just document the location—it creates a narrative that can move and captivate those who view your images. Whether a beginner or a more experienced photographer, these practical tips can help you build a strong, coherent visual story.
Clearly Define Your Theme
Before you start shooting, decide on a clear theme for your project. Pompeii offers various visual cues that can easily overwhelm if not approached with focus. Choose what you want to convey: everyday life in ancient Rome, the tragedy of the eruption, architectural grandeur, or the relationship between tourists and ruins. A defined theme will guide your photographic choices and help you decide what to include and leave out.
Create a Preliminary Storyboard
Plan your narrative with a preliminary storyboard or list of shot ideas. This will help you visualise the project structure and stay consistent while shooting.
Choose Your Narrative Perspective
Consider adopting an objective point of view, letting the place speak for itself, or a subjective one reflecting your personal emotions and impressions. Whichever approach you choose, keep it consistent throughout the project.
Balance Documentation and Interpretation
Good documentary photography is both factual and interpretive. Combine images that record reality with photos that evoke emotion or atmosphere, turning your reportage into a more expressive and layered visual experience.
Narrative Structures and Approaches
You can explore different narrative structures to guide your photographic work depending on your chosen theme. One option is the chronological narrative, which follows the evolution of time or recreates a typical day in ancient Pompeii. This approach invites you to imagine life still flowing through its streets—from the soft light entering a domus in the morning, to the activity in the forum and shops at midday, and finally the stillness of the evening. Each image becomes a fragment of a larger temporal story, immersing the viewer in a reimagined daily routine.
Alternatively, you may choose a contrasting narrative, which emphasises the dialogue between past and present. This perspective focuses on the tension between historical memory and modern perception: a fresco photographed by a tourist, an ancient wall next to a modern sign, or nature reclaiming the ruins.
These contrasts invite reflections on time, transformation, and continuity, creating a powerful visual link between ancient life and contemporary presence.
Another compelling structure is the thematic approach, in which the project is built around a specific idea or motif, such as craftsmanship, domestic rituals, religious symbols, or the passage of time. Concentrating on a single topic allows you to explore it in depth and develop a coherent visual rhythm.
This method is particularly effective for creating a personal body of work, where repetition, variation, and close attention to detail reveal new layers of meaning.
Each of these narrative models offers a unique perspective and challenges you to observe Pompeii not only as a historical site but also as a living, interpretive space. Choosing the structure that best matches your intent will help you shape a story that is not only visually consistent but also emotionally resonant.
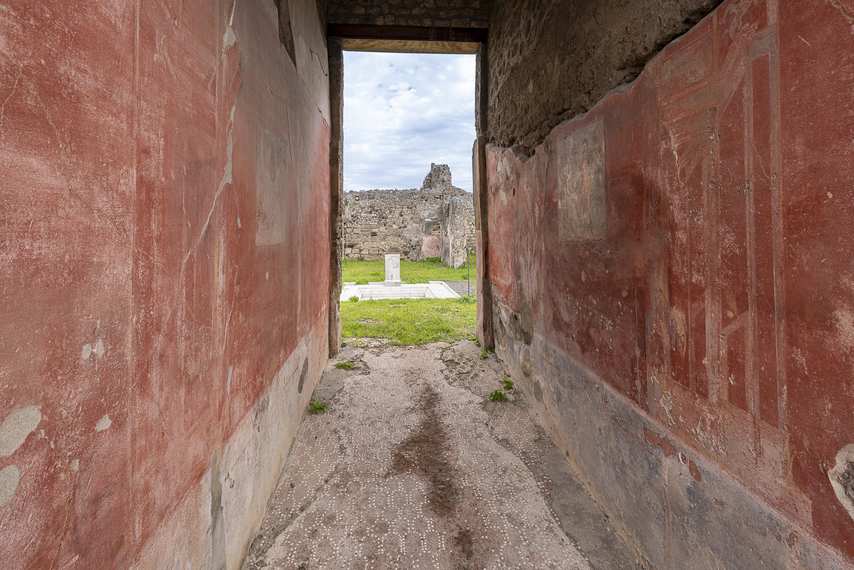
Visual Techniques and Expressive Tools
It is essential to move beyond simple documentation and consciously use visual language to build a photographic project with narrative depth. One of the most effective ways to achieve this is by seeking original perspectives. Instead of limiting yourself to the most famous and widely photographed views,observe Pompeii with fresh eyes.
Pay attention to textures, geometries, fragments of frescoes, shadows cast on ancient walls, and the way light changes throughout the day. Even the most iconic site can reveal something new if you change your position, height, or angle of view.
Light, in particular, plays a central role in shaping the expressive tone of your photographs. In the early morning, soft and warm light can convey tranquillity and intimacy; around midday, intense sun and sharp contrasts can enhance the monumentality of structures and the graphic power of shapes; in the afternoon, light becomes softer again, enriching colours and bringing out details with elegance. Recognising and using these variations gives each image a unique emotional atmosphere.
The presence of people in your photos, though often considered a disturbance, can become a powerful storytelling element. Visitors, whether intentionally included or not, offer a contemporary dimension and help contextualise the scale and use of spaces.
A silhouette in the distance, a gesture, or a fleeting interaction with the ruins can bridge the past and present, adding humanity and rhythm to your composition.
In building your story, you can also use visual “characters”—recurring elements that tie the narrative together.
These could be specific motifs, such as red walls, broken columns, or open doorways, that appear throughout the project. Their repetition gives the series coherence and helps the viewer recognise a pattern or visual signature.
Symbolism and subtext also play a subtle but crucial role. A closed door might suggest mystery or exclusion; a crack in a fresco could evoke fragility or the passage of time. Learning to recognise these visual metaphors—and to include them deliberately—adds depth and interpretive richness to your work.
Maintaining a consistent visual language is equally important. This doesn’t mean making every photo look the same, but choosing an aesthetic approach that reflects the tone you wish to communicate.
For example, black-and-white photography can emphasise timelessness and form; soft, muted colours might evoke nostalgia or calm; and bold saturation may reflect intensity and drama. What matters is that these choices serve your narrative and remain consistent across the series.
Captions can support and enhance the story if your project is exhibited or published. Go beyond technical information: a short description, quote, or personal reflection can guide interpretation and emotionally engage the viewer without overexplaining.
Finally, tension and contrast are the engine of any narrative. Within your images, look for oppositions—between light and dark, ruin and vegetation, emptiness and presence. These visual contrasts generate rhythm, invite curiosity, and give your story a sense of progression and meaning when resolved or echoed later in the sequence.
Narrative Editing, Sequencing and Closing
Creating a photographic story doesn’t end in the field—it continues in the editing and sequencing phase, where the images are shaped into a cohesive and compelling narrative. This process is just as creative and vital as shooting itself.
Begin by selecting images representing your story’s different moments, moods, and functions.
Think of your project as a visual arc with a beginning, middle, and end. The introduction might establish a sense of place, offering expansive views or key architectural elements that orient the viewer.
The development phase should introduce variety and rhythm, alternating between close-ups and wide shots, light and shadow, human presence and space.
The narrative tension builds through contrasts, symbols, or emotional cues. Then comes the climax—the most intense or revealing image that embodies the heart of your project. Finally, the conclusion should bring closure or reflection, leaving the viewer with a lasting impression or open question.
Even though photography doesn’t follow a temporal sequence like film or literature, you can still evoke a sense of time and movement through your editing. Alternate dynamic scenes with moments of stillness; shift from bright, expansive spaces to intimate, shadowed corners. This rhythm keeps the viewer engaged and allows the story to breathe.
Experimenting with different narrative structures is key. You might arrange images by theme, juxtapose contrasts, or create recurring visual echoes throughout the sequence. For example, a recurring motif—such as a door, a figure, or a broken wall—can serve as a visual refrain that anchors the viewer’s attention.
Using repetition or variation on a theme reinforces the series’ coherence.
One particularly effective technique is circular storytelling, in which the narrative ends where it began—or visually references its opening—to create a sense of return and unity. This approach enhances the project’s emotional and conceptual resonance.
Don’t underestimate the power of silence in a photographic series. Minimalist or seemingly empty images act as visual pauses, allowing viewers to reflect and prepare for what comes next. These moments of visual rest can elevate the storytelling by emphasising what surrounds them.
In closing, consider including a personal reflection as a final image, caption, or brief written statement. This ending doesn’t need to explain your project, but should express what Pompeii has meant to you as a photographer. It may point to the site’s historical weight, your emotional journey through its ruins, or your broader thoughts on time, memory, and art.
The best photographic narratives are technically skilled, deeply felt, and thoughtfully composed. Through careful sequencing, rhythm, and emotional coherence, you can create a visual story of Pompeii that is historically rich, personally meaningful, and artistically lasting.
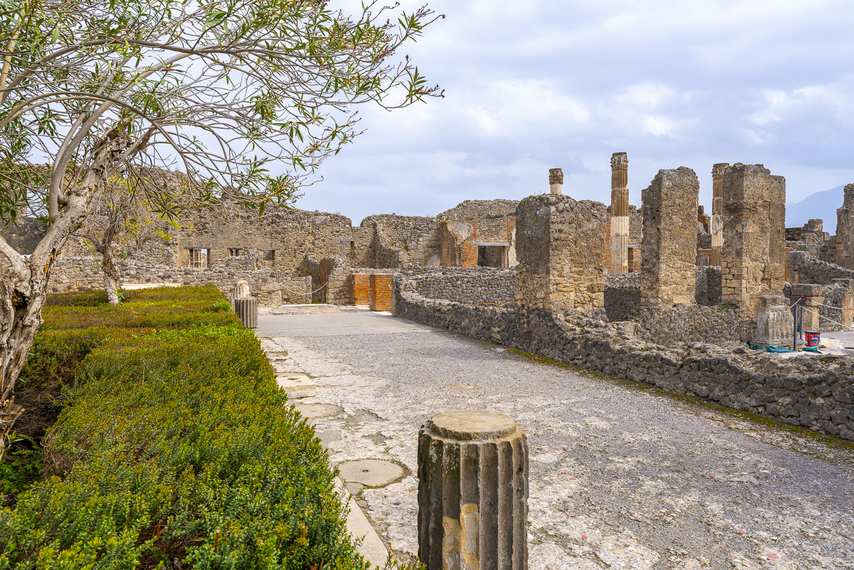
Conclusion
Photographing Pompeii is far more than a technical exercise—it is an emotional and cultural journey that weaves past and present, inviting each photographer to tell a unique story.
This guide covers all the essential aspects for capturing memorable images: carefully planning your visit and selecting the right equipment, mastering light and exposure techniques, and understanding the rules safeguarding this extraordinary heritage.
Every section offers practical advice and creative suggestions for amateur and professional photographers, encouraging a narrative approach that transforms each image into a visual story. Attention to detail and awareness of Pompeii’s historical and emotional depth allow you to bring ancient ruins back to life in your distinctive way.
Moreover, ethical respect for the site and mindfulness of its cultural significance are essential to responsible photography.
Each photo taken in Pompeii becomes a form of testimony that contributes to preserving and celebrating the memory of a place that still speaks to us across the centuries.
So, plan your visit carefully, observe the ever-changing dialogue between light and stone, and let yourself be inspired by the timeless beauty of this ancient city. Your next image might not just be a souvenir, but a powerful reflection of a past that continues to shape us.
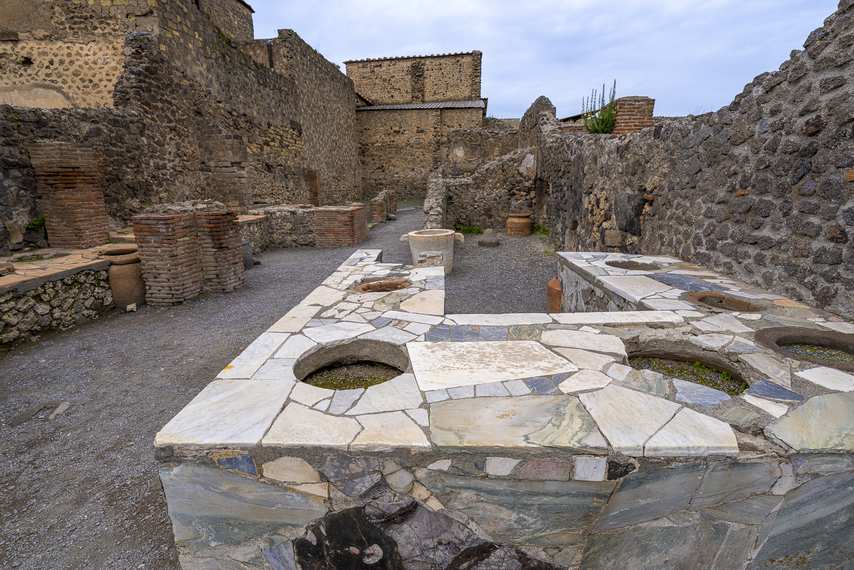
FAQ About How to Photograph Pompeii Archaeological Park
The ideal time to photograph Pompeii is during the off-season, especially in the spring and autumn months, when the site is less crowded and the weather is more favourable. Early morning and late afternoon also provide soft, angled light that enhances architectural textures and creates a more evocative atmosphere.
No, tripods and flash are prohibited inside Pompeii Archaeological Park. These restrictions protect the frescoes and interior spaces. To achieve sharp, well-exposed photos, consider using a fast lens, higher ISO settings, or stabilisation techniques suited for low-light environments.
Many iconic spots exist to photograph, including the Forum, the Large Theatre, and the House of the Vettii. The Forum offers a stunning view of Mount Vesuvius in the background, while the Large Theatre captures the scale and grandeur of ancient Roman public architecture. Each location presents unique visual opportunities to explore different aspects of Pompeian life.
To take photos without many people, it is advisable to arrive early in the morning, before the influx of tourists. Also, visiting areas farther from the main routes, such as Via dell’Abbondanza, can provide a quieter photographic experience. To avoid crowds in your shots, try arriving early in the morning, ideally at the park’s opening time. Planning your route and choosing entrances strategically can help you reach key locations before they fill up. Visiting less central areas or returning during lunch hours may also give you more peaceful moments for shooting. To take photos without many people, it is advisable to arrive early in the morning, before the influx of tourists. Also, visiting areas farther from the main routes, such as Via dell’Abbondanza, can provide a quieter photographic experience.
No. Flying drones within the excavations is strictly forbidden unless you have received specific authorisation from the park’s administration. If you are interested in aerial photography, you must follow the official procedure and submit a request through the Pompeii Archaeological Park’s website.
You should bring a lightweight camera, versatile lenses and a good battery. Don’t forget water, snacks and a hat to protect you from the sun, especially during the summer. Comfortable shoes are essential, as the site is large and the pavement can be uneven. Bring a lightweight camera setup, such as a DSLR or mirrorless camera with a versatile zoom or fast prime lens. Don’t forget essentials like a spare battery, memory cards, a polarising filter (if needed), and a water bottle. Comfortable shoes, a hat, and sunscreen are highly recommended due to the site’s size and exposure to the sun. You should bring a lightweight camera, versatile lenses and a good battery. Don’t forget water, snacks and a hat to protect you from the sun, especially during the summer. Comfortable shoes are essential, as the site is large and the pavement can be uneven.
Yes, photography is allowed inside domus and monuments, but only without flash. Use available natural light and adjust your camera settings accordingly to preserve the delicate surfaces of frescoes and architectural details.
If you are an amateur photographer, a smartphone with a good camera may suffice, but if you want to get more professional shots, an SLR or mirrorless camera with bright lenses (such as a 24-70mm f/2.8) is ideal. A modern smartphone with a good camera might be sufficient if you’re a casual visitor. However, a mirrorless or DSLR camera with a bright lens (such as a 24–70mm f/2.8) is ideal for those seeking higher image quality and greater creative control. Prioritise lightweight and familiar gear for flexibility and comfort during long walking sessions. If you are an amateur photographer, a smartphone with a good camera may suffice, but if you want to get more professional shots, an SLR or mirrorless camera with bright lenses (such as a 24-70mm f/2.8) is ideal.